Sunday 27 April 2014

Vinegar

I'm a fan of all things vinegar.  I don't know when that happened it just did.  One day I was looking in my kitchen cupboards and I discovered that I had about nine bottles of the stuff.  All different types. And actually weirdly, none of it the malt vinegar I had always considered to be the only kind of vinegar there was.


I use white vinegar a lot for cleaning.  I also use vinegar a lot as a salad dressing, a touch of balsamic over an avocado and tomato salad is delicious.  I use vinegar in sauces, especially if I don't have an open bottle of wine to hand.  There are a couple of places that I never really expected to use vinegar.  Firstly I never expected to make a drink out of it, but a year or so ago someone told me about a way to make alcohol free Pimms.  Even though the ingredients sounded a little crazy I had to have a go.  All you need is a drop of balsamic vinegar and some lemonade. I add a dribble of vinegar to the glass first, just enough to cover the bottom of a tall glass and then add the lemonade on top.


In my mind, what make s a Pimms delicious is all the trimmings, particularly the mint.  I love to add a few leaves of fresh mint, a slice or two of cucumber and some citrus-y fruit.  It even looks like you're drinking Pimms.  Sounds weird I know, but totally worth a go.


So when I saw a Pin for Vinegar Pie I just had to have a try.  I made a pie crust, and then added the filling.  I only used 3 cups of water, and I didn't have any maple extract, so I used vanilla and no cinnamon.  Also I couldn't find my whisk, so I just used a fork. Oh, and I'm lazy and couldn't be bothered to wash up the sieve that would be needed to strain the mixture, so I just hoped for the best and poured it into the crust.  Also, I got a bit bored about 5 minutes into the boiling process, and the mixture was definitely coating my spoon, I decided enough was enough and my arm was hurting anyway!


It looked way too liquid-y as I poured, and I figured that I had probably just wasted a load of time, ingredients and energy.  Very frustrating.  I put the whole thing in the fridge and hoped that time would work its magic.


And it did!  It tastes like a custard pie and even managed to hold together my very dodgy pie crust.  Result.  Another win for vinegar related recipes.  The Husband enjoyed his pie, but the kids refused to eat it.  Some guests and one of their children did enjoy it (hopefully they weren't just saying that) too.

Sunday 20 April 2014

The Easter Tree

Happy Easter.  Here is our Easter Tree.  Apparently it is quite tricky to photograph!


As well as the little felt lamb I showed you here, I also crocheted a few flowers for it.  We had some Easter stickers in my craft drawers and we used those to make some more decorations.  There are a few bought decorations as well.  


The kids decorated it with all the bits and bobs (well until they couldn't work out how to put any more on and then the Husband had to do it!).


I want to create some more chicks to put on there next year.  Hope everyone is having a fun day. 


Wednesday 16 April 2014

Whilst I'm Crafting...

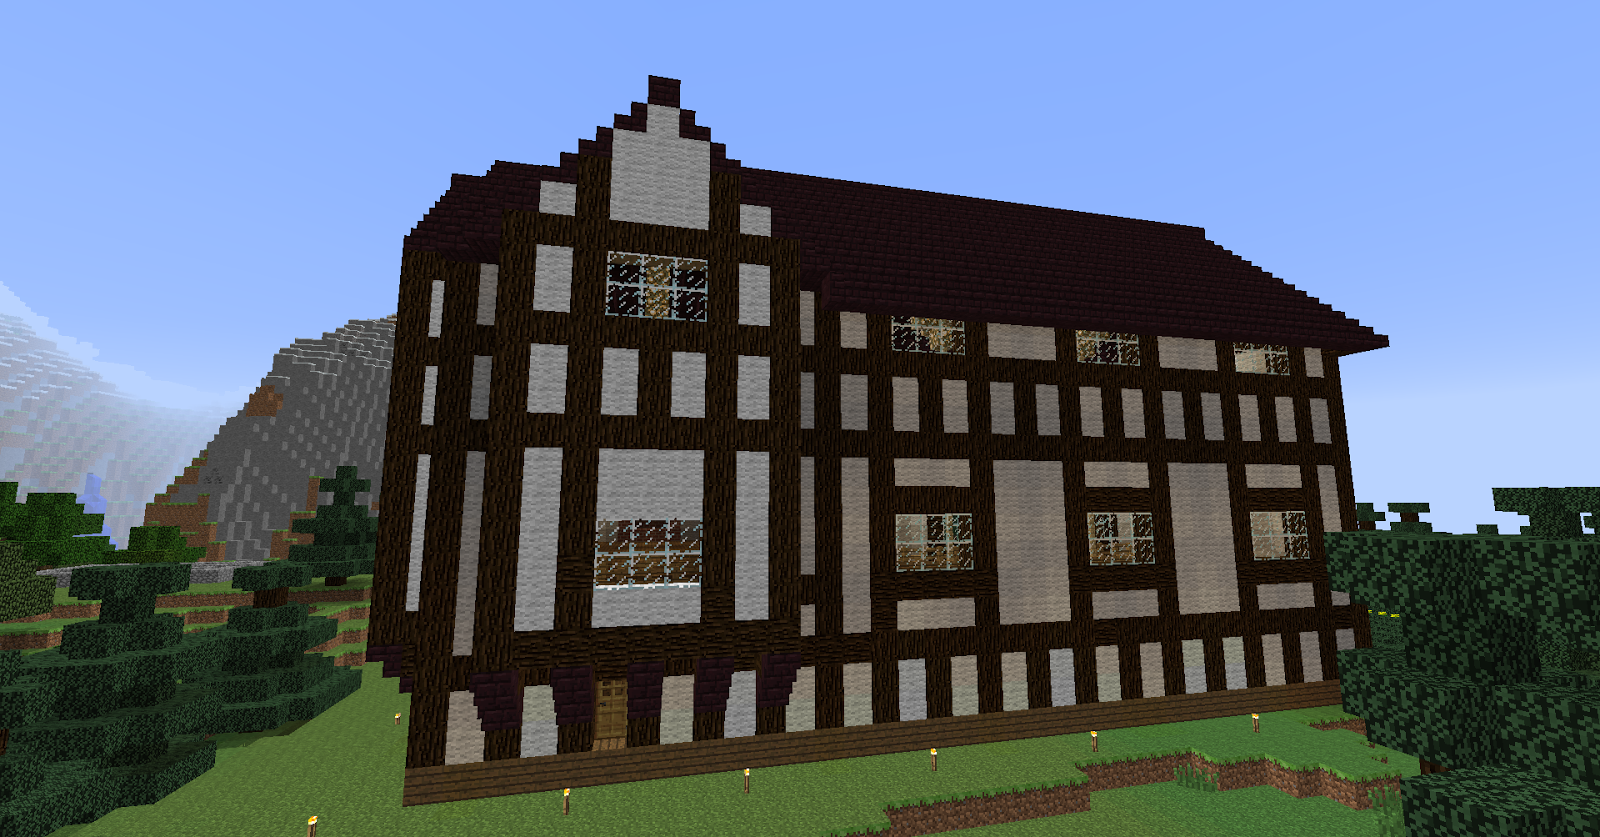
...the rest of the family have been doing something pretty special.  They have been building, gardening, farming, mining and even doing a bit of forestry.  Ok, so it was on Minecraft, but still, quite impressive. 


They worked together, the Husband gave the kids jobs to do to help with the building.  


One Tudor House.


Many hours of work has gone into this development.  it progressed over the last couple of weeks.


Once the building was complete, the gardens were next.


We looked at pictures of Tudor gardens to give us ideas.


The Husband has started on the interior, but they still need to add a load of furniture.


For those that play Minecraft, this was all made in a survival world.  There have been several near misses. Creepers coming to close, and when setting light to a fire in a building made of wool and wood the brick chimney really does need to go all the way round and all the way to the top of the building!


You can see the, now, fully enclosed chimney in the above picture.


I'm hoping they produce a huge dining area.  I think I may have to Google for Tudor furniture to see what should be in there!


I'm looking forward to see what they create next.


Monday 14 April 2014

Very Quick Felt Lamb Craft

I've been decorating an Easter Tree this week.  We always used to have an Easter Tree when I was little, but this is our first year with one.  I'm hoping to share some pictures of it soon.  I felt that it didn't have enough lamb related decorations on it, so I created a quick felt sheep/lamb.


I drew round a flower shaped cookie cutter, and then felted some black roving wool in three sections. One larger oval for the face and two smaller ones for the ears.  I then felted the yarn onto the back of the lamb's body so it could hang on the Easter Tree.  I added a couple of french knots with some embroidery thread.  The Husband is calling this craft the return of the zombie sheep.  Maybe that is a good thing, I can double up the decorations for use at Easter and Halloween?!  So I did another without the zombie looking eyes.


I'm not convinced.  I think I prefer eyes, zombie or otherwise.  Obviously I just need to work on something that looks more normal!

Saturday 12 April 2014

Finally...One Creeper Cushion Cover

So after what has seemed like the longest project I've ever crocheted, though certainly not the biggest it is done:


I am pleased with him, and I enjoyed playing with the squares, but the sewing together of all the squares took a long time, and then creating a back for the cushion seemed to take even longer.  I simply used double crochet (American Terms) all over the back in the same colour, slip stitching to the sides.  It was dull and it took a while, especially when I wanted to create a sort of flap, so I had crochet some elements of it twice.  Sigh. Here is the back.


Looks smart don't you think.  And here is the edge, where I slip stitched to the granny squares.


So as a learning experience, although I would use this method to create blankets/cushion covers again, I would use smaller cushions and try to use more of the same colour, so that at least the sewing together wasn't quite so tedious!


Off to find a new crochet project now...

Sunday 6 April 2014

Crochet Owl Chocolate Egg Cover

Yep, I seem to have got obsessed with Egg covers, those they could all be turn into cuddly toys/bean bags or....nope maybe that is it!


This is a slightly easier pattern (I think anyway) because you don't start off in the round, you start with a chain that joins up and then you continue to crochet around that.  I love owls and at the craft fair I went to recently I saw a couple of owl cuddly toys and figured I could make something similar.  Although I think the ones I saw were knitted, so I was never going to make something exactly the same.  Knitting and I don't mix!


I really love this little guy, and I'm so pleased how he turned out. I want to do a whole load and I wish I'd started a little earlier so I could have made enough for a little thank you for teachers this Easter.  I think he would look awesome in stripes or colour blocks too.


I used a 2.5mm hook with normal DK acrylic wool for this project.  The pattern is my own.  The terms are American terms

Body (Make one)
Row 1          Chain 20 and join in a circle.  Make sure you don't twist the chain otherwise you'll get                             frustrated (trust me on that one!)
Row 2 - 10   Chain 2 and then half double crochet into each stitch and sip stitch to Join at the end                                of the row.
Row 11        You should have a hollow cylinder now.  Fold this in half.  Single crochet the first 2                                stitches together.  Chain 3 and slip stitch into the first chain (this makes his little ears, so                          you are making a little picot ear).  Continue to single crochet along the top until the last                          stitch and then chain 3 and slip stitch into the first chain (this is the other ear) and then do                        one last single crochet before fastening off.


Eyes (Make two)
Row 1         Magic circle , chain 1 and 6 single crochet into the circle. Join with slip stitch to the chain
Row 2         Chain 1, 2 single crochet into each stitch.  Join with slip stitch to the chain and fasten off

Use embroidery thread to make the eyes.  I love the sleeping owl look, but you could quite easily have a wide awake owl if you wanted.  I would probably crochet up to the end of the first row of the eyes in black and then swap to the white yarn (or just do an extra black circle and sew it into place).

Alternatively you could use scraps of felt cut into circles

Attach these to the body.  I found this quite fiddly.


Wings (Make two)
Chain 6, 3 single crochet into the 2nd stitch from the hook and along the remaining chains.  5 single crochet into the end chain.  Single crochet on the other side of the chain (into the back loops).  In the last chain (the one you have already put 3 single crochet into at the beginning) complete 2 more single crochet.  Slip stitch to join.

Chain 1, single crochet around, but at the end where you did 5 single crochet before, on the 3rd single crochet chain 2 (this just makes a little point at the end of the wing, it isn't necessary, but I prefer it that way) , and continue to single crochet around.  Slip stitch into the chain and fasten off.  Attach these wings to the side of the body.

Finishing Off
I simply added a scrap of orange felt (with fabric glue - I'm lazy) to make a beak and you're done.

If you wanted to make it big enough to fit comfortably over a normal egg, I would simply up the hook size, I would imagine a 3.5mm hook would do it. Depends on the size of you eggs I suppose!